We are now ready to design the layout of the report; columns, and rows.
![]() Main Menu | Reporting | My Reports (select report) | Add button
Main Menu | Reporting | My Reports (select report) | Add button
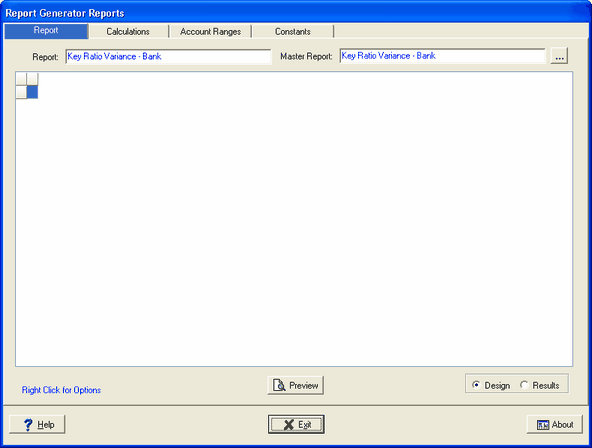
After the above path has been selected, the following screen is displayed:
Columns
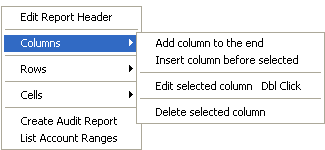
To start the design process, right click anywhere in the white report window. We will first set up our column. In the drop down screen below, we will select Columns and Add column to the end since we do not have a previously defined column set up.
Once we have selected Add Column, the following screen is displayed:
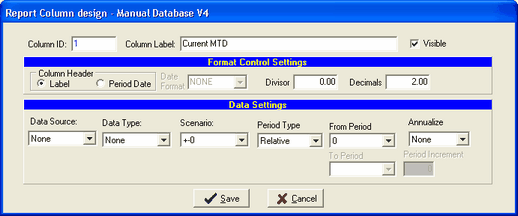
Column ID - The system automatically assigns the Column ID number.
Column Label - We are going to label the first column - Current MTD.
Visible - Check box so that column label is visible on the report.
Format Control Settings:
Column Header
There are two options for the column heading, we are going to use the column label instead of the selected period date format.
Date Format
Not used here. When the Period Date column header is selected, choose the appropriate date format from several month/year formats.
Divisor
Not used here. The divisor is used to format the data in the column. For example, to display data in thousands enter 1000.
Decimals
We are going to use 2 decimal positions. To change the decimal position of the data enter the appropriate decimal places.
Format settings in the Cell will override the same data formats in the Column. Unless the Cell option, Reset Cell(s) to Column Default, is taken. See Cells for more information.
If the Column setting for Divisor/Decimals should be the default, make sure the Cell settings are "None" not zero.
Data Settings:
See Data Definition for an explanation of the data fields below.
Data Source - Set to NONE
Data Type - Set to NONE
Scenario - Select the no change scenario.
Period Type - We will select Relative to the current period in the field below.
From Period/To Period - To use the current period, we enter "0" in the From Period box.
Annualize - We will not annualize the data.
Period Increment - Not used here.
SAVE - Click SAVE to save the column design settings.
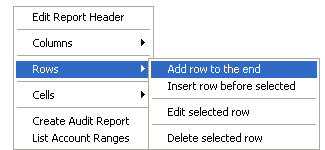
Rows
To design the rows for our report, we start by right clicking anywhere in the white report window. In the drop down screen below, we will select Rows and Add row to the end since we do not have a previously defined row set up.
Once we have selected Add Row, the following screen is displayed:
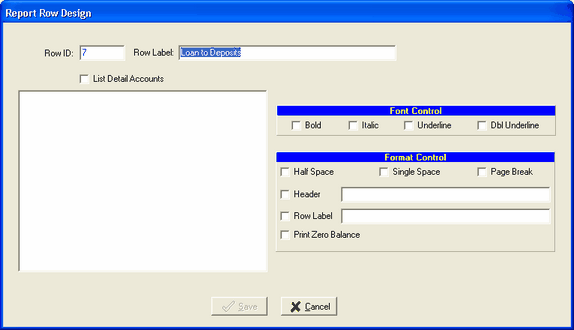
Row ID - The system automatically assigns the Row ID number.
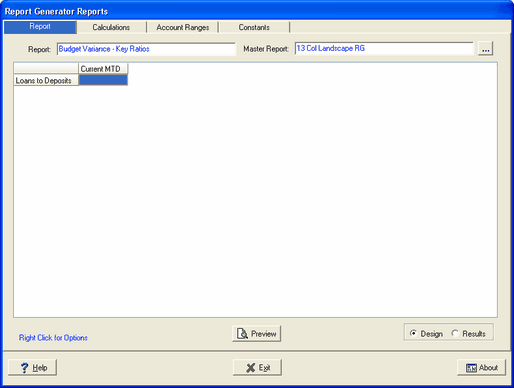
Row Label - We are going to label the first row - Loans to Deposits. Each row will represent a different Key Ratio.
SAVE - Click SAVE to save the row design settings.
The Report tab now looks like this: