![]() Main Menu | Param. Setup | Common | GL/AL Cross Ref.
Main Menu | Param. Setup | Common | GL/AL Cross Ref.
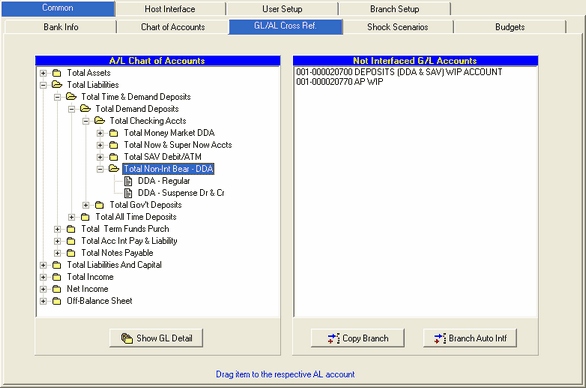
The GL/AL Cross Reference tab displays the A/L chart of accounts on the left side and any G/L accounts not cross referenced to an A/L account on the right side of the screen. The GL/AL Cross Reference screen is displayed below:
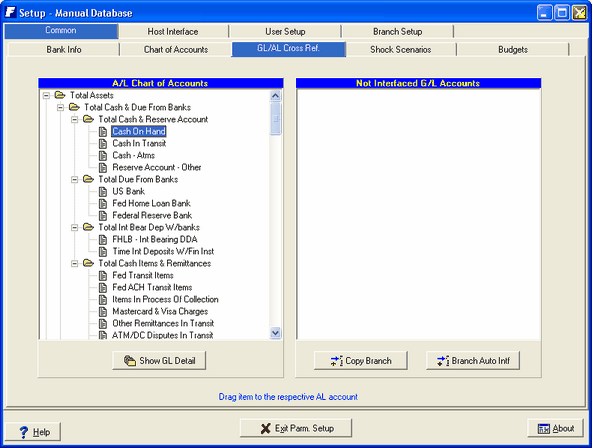
A/L Chart of Accounts
This is the same chart of accounts you saw earlier under the Chart of Accounts tab. You can display as much or as little of the chart by clicking the ![]() or
or ![]() icons to the left of an account.
icons to the left of an account.
Find Account By Description
The option Find Account can be accessed by right clicking on the Chart of Accounts and the following pop-up option will be displayed.
![]()
This option will help you quickly find a specific account in your chart of accounts.
See Target Balance Options in the Advanced Income Shock module for the Find Account details.
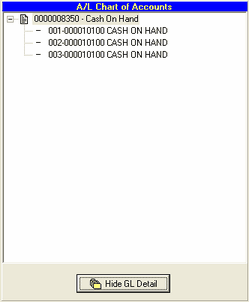
Show GL Detail
By looking at the displayed A/L accounts on the left, you can't see the G/L accounts that are cross referenced to the A/L accounts. By selecting an A/L account (an account with a ![]() icon), and pressing the Show GL Detail button, the system will display all G/L accounts cross referenced to the A/L account as shown below:
icon), and pressing the Show GL Detail button, the system will display all G/L accounts cross referenced to the A/L account as shown below:
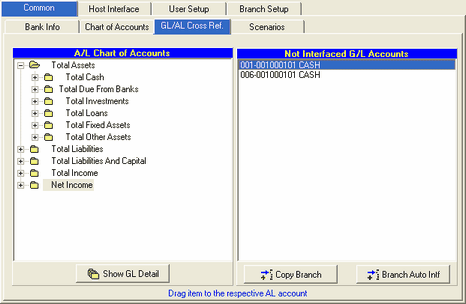
Not Interfaced G/L Accounts
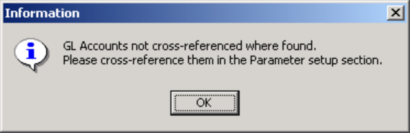
This area of the screen displays G/L accounts not cross referenced to an A/L account. If the system detects any of these accounts when you process the general ledger, it will display a message telling you there are accounts not cross referenced. These will need to be corrected before you can continue processing.
Copy Branch
If you are adding a new branch and have setup the new branch in the Branch Setup tab, you will also need to interface the new branch GL accounts to the A/L accounts. Do this by pressing the Copy Branch button.
The system has an automatic interface and AL account creation feature. Below is an example of how these two features work:
Branch Auto Interface
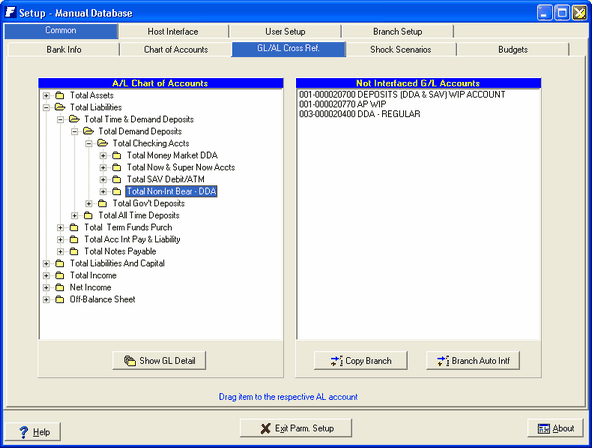
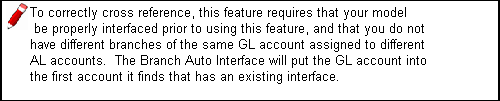
The automated Branch Auto Intf. feature helps avoid errors that could be created if you were to drop the account into the wrong AL account. This feature is used when you have many accounts to be cross referenced in the Not Interfaced G/L Accounts box on the right.
In the following screen, the Deposit WIP and AP WIP accounts are new accounts in the GL. The other account, DDA-Regular is a new branch for an existing GL account that already has an associated AL account established in the model.
Click the Branch Auto Int. button, located in the lower right corner of the screen.
This triggers the easiest way to cross reference, by allowing the system to look for existing items with the same GL number. The system will attempt to cross reference each non-interfaced account with an existing AL account it finds with the same GL number.
You can check your current setup by printing a Chart of Accounts report in the system and verifying the existing cross reference by selecting the Chart of Accounts tab and clicking on the Print Chart button.
A confirmation message appears, indicating what the system has interfaced.
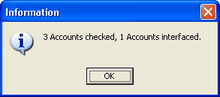
In this example the model checked all 3 non-interfaced accounts and was able to automatically assign one to the existing AL account.
Click OK
Automatic A/L Account Creation
For those of you who need to set up new accounts and cross references, the “drag to create account” feature is a significant time saver in creating required new accounts!
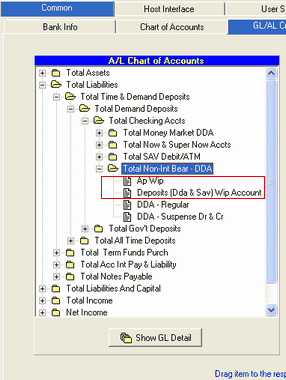
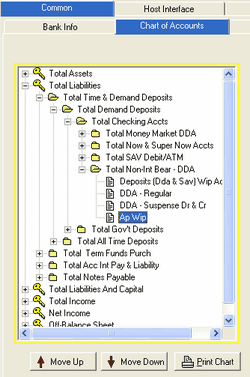
To set up and cross reference brand new accounts, expand the A/L Chart of Accounts on the left and determine the subtotal account to which the new account will be assigned. In the example below, the new GL WIP accounts should be part of the Total Non-Int Bear - DDA subfolder.
Select one of the new GL accounts on the right.
NOTE: You should select the GL account that has a description that you would like to see as the description of the AL account you are establishing. (If more than one branch of the same GL account is listed, it is possible that they have different descriptions)
Drag the GL account over to the A/L Chart of Accounts area, highlighting the folder to which it should be assigned. When you release, a confirmation screen will ask you if you want the new account suppressed in all condensed reports.
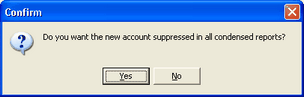
When you select Yes or No a new AL account will appear, with the same description as the GL account you dragged into the A/L Chart of Accounts.
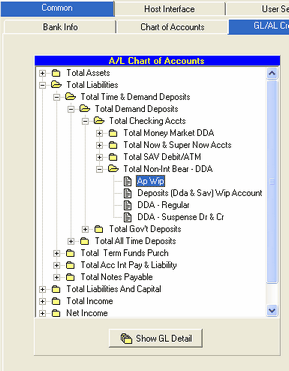
In this example, the WIP accounts were dragged into the Total Non-Int Bear - DDA subfolder. The new AL WIP accounts appear and all associated GL accounts are interfaced
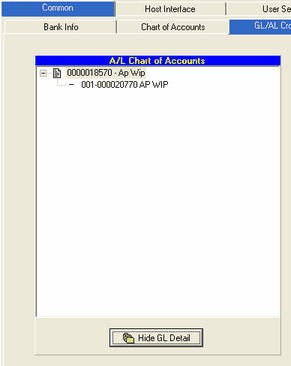
To confirm the interface, you can highlight the new account and click on the Show GL Detail button. The GL accounts will appear within the AL account as shown below.
(This can be performed on any interface you establish to confirm correct dragging of accounts)
You can move the account within the folder by clicking on the Chart of Accounts tab. Select the account, and click the Move Up or Move Down button to change the position of the account as shown below:
Once all interfaces are completed, return to the Data Capture and restart the copy and process procedure to update the model.
For those of you who have set up new accounts and cross references, you can see that the “drag to create account” feature is a significant time saver in creating required new accounts! And the use of the automated Branch Auto Intf. feature helps avoid errors that could be created if you were to drop the account into a wrong AL account.
There are two types of cross referenced G/L accounts:
| • | G/L account cross referenced to it's own new A/L account (one for one cross reference.) |
| • | G/L account cross referenced to an existing A/L account. |
The first type of cross referenced G/L account requires a two step setup. First, you must setup the A/L account in the Chart of Accounts tab. This is accessed through the Main Menu|Param. Setup|Common |Chart of Accounts option. The second step is to go to the GL/AL Cross Ref. tab and drag n' drop the G/L account on the right side of the screen to the A/L account you just setup in step one on the left side of the screen.
The second type of cross referenced G/L account requires just one step. In the GL/AL Cross Ref. tab, you can cross reference the account by simply clicking on the G/L account on the right side of the screen and dragging it to the A/L account on the left side.

If you accidentally cross reference the G/L account to the wrong A/L account, it's easy to fix.
| • | Select the wrong A/L account on the left side. After selecting the account, you will need to press the Show GL Detail button to display the G/L account. |
| • | Select the G/L account you cross referenced in error and drag n' drop the account to the right side of the screen. |
| • | Now find the correct A/L account on the left side and drag n' drop the G/L account from the right side to the correct A/L account on the left side. |
See Reporting/Standard Reports/Misc Templates chapter for a sample of the Chart of Accounts Listing report which shows the connection between GL and AL accounts.