![]() Main Menu | Reporting | My Reports
Main Menu | Reporting | My Reports
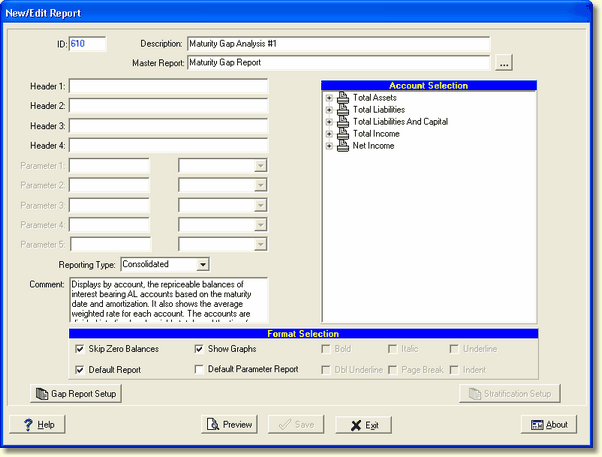
To change the Gap report setup, select a Gap report from the Gap Group Filter and press the Edit button. The Gap Report Setup button is located in the lower left of the New/Edit Report screen. You will be able to set your time frames that appear across the gap reports. You can setup an unlimited number of reports.
When you select the Gap Report Setup button, the following screen will be displayed. This screen displays the time frames for the report selected.
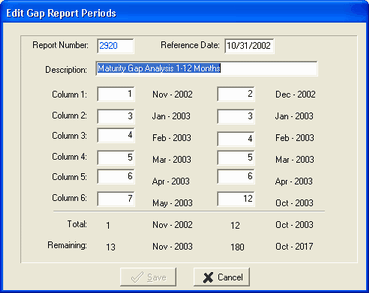
Report Number - The system will assigned a number.
Reference Date - This is the last processing date. This field is also helpful when you are setting up a new Gap report and want to see the date results of the periods you have entered.
For example: On 10/15/02, you entered a new Gap report and time frames. You can change the Reference Date to 10/31/02 because that will be your next processing date. Press enter and the month and year next to each time period will be displayed based on the reference date you entered. You can see if your time frames are setup correctly.
If you edit an existing Gap Report, the Reference Date will default to the last processing date.
Description - You can change the title description of your gap report.
Columns 1-6 - These columns represent the columns going across the top of the Gap report. Enter the time periods for each column. Valid periods are 0-180. "0" represents past due or matured items. Each Gap report is setup with 8 columns. The first 6 columns are user defined. The 7th column is a summary of columns 1-6. Column 8 is a summary of the remaining periods.
As you enter each time period, the month and year will be displayed based on the reference date you entered. You will notice that the Total and Remaining fields at the bottom will change as you enter each time frame.