![]() Main Menu | Data Capture | Misc. Data Entry
Main Menu | Data Capture | Misc. Data Entry
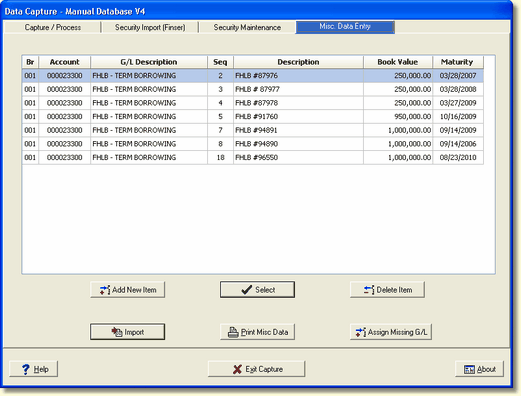
The Misc. Data Entry is a data entry area for adding items to the system not tied to an application file. Examples of such items are interest bearing items that are only carried in the General Ledger. Also, third party Portfolio files can be imported into the Misc. Data Entry tab.
If an investment item is entered here, the processing capabilities from this data entry are very limited due to the minimal information provided.
Edit an Item
To maintain an item, select the item within the grid and press the Select button. The following screen will be displayed.
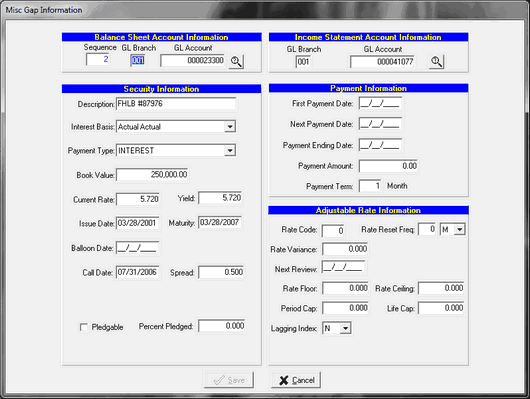
Balance Sheet Account Information
Sequence - The sequence number is used to differentiate between multiple securities going into the same G/L account. This field is user defined.
GL Branch - Enter the asset/liability G/L branch number for the item you are entering. The balance sheet and income statement branch numbers must be the same.
GL Account - Enter the asset/liability G/L account number for the item.
![]() - The lookup button allows you to find a balance sheet branch and account when setting up a new entry. You can search by GL description or GL account number. When you have located the G/L account you need, the system will also display the associated AL account description.
- The lookup button allows you to find a balance sheet branch and account when setting up a new entry. You can search by GL description or GL account number. When you have located the G/L account you need, the system will also display the associated AL account description.
When the lookup button is selected the following screen is displayed.
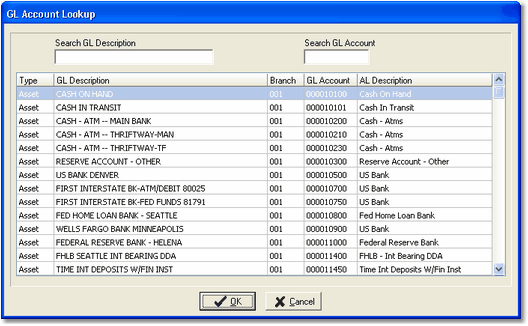
You can select the account by double clicking or press OK. It will insert the account number into the GL Account field.
NOTE: Be sure to select the specific branch the item is booked to if branch mode is used.
The system will validate the type of account you are entering. If you are entering the GL account manually and accidentally enter an income/expense account in the Balance Sheet Account Information area you will receive the following error:
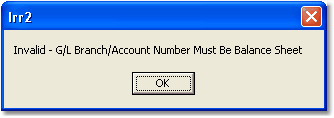
Click OK and re-enter the correct balance sheet account.
Income Statement Account Information
GL Branch - Enter the income/expense G/L branch number for the item you are entering. The balance sheet and income statement branch numbers must be the same.
GL Account - Enter the income/expense G/L account number for the item.
![]() - The lookup button allows you to find a G/L Income or Expense account when setting up a new entry. The G/L Account Lookup screen will only display Income and Expense accounts. You can search by GL description or GL account number. When you have located the G/L account you need, the system will also display the associated AL account description.
- The lookup button allows you to find a G/L Income or Expense account when setting up a new entry. The G/L Account Lookup screen will only display Income and Expense accounts. You can search by GL description or GL account number. When you have located the G/L account you need, the system will also display the associated AL account description.
When the lookup button is selected the following screen is displayed.
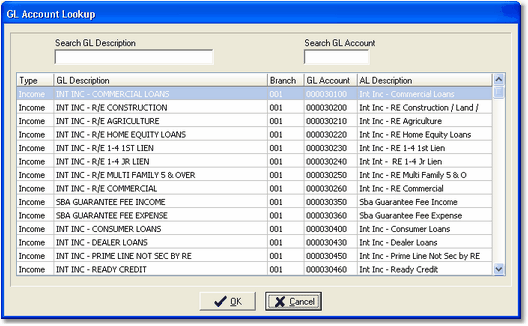
You can select the account by double clicking or press OK. It will insert the account number into the GL Account field.
The system will validate the type of account you are entering. If you are entering the GL account manually and accidentally enter a balance sheet account in the Income Statement Account Information area you will receive the following error:
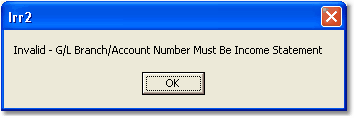
Click OK and re-enter the correct income statement account.
![]()
Security Information
Description - Enter the description of the security.
Interest Basis - Select one of the interest basis categories by clicking on the arrow to bring up a drop down box. The interest basis tells the system how to calculate the interest for the security. Available options are:
30/360
Actual/365
Actual/360
Actual Actual
Payment Type - If you are setting up an asset or liability account, select one of the payment types by clicking on the arrow to display a drop down box. Available options are:
PRINCIPAL - |
payment amount is for principal only |
INTEREST - |
payment is for accrued interest only |
PRIN and INT - |
payment amount includes accrued interest |
AT MATURITY - |
principal and interest will be paid at maturity |
Book Value - Enter the net book of the item. Include decimal point and cents.
Current Rate - Enter the current rate of the item.
Yield - Enter the yield on the item, which may be different than the current rate.
Issue Date - Enter the date the item was purchased.
Maturity - Enter the date when the item matures.
Balloon Date - Enter the date at which the commitment ends if it is a balloon item (which is prior to maturity date).
Call Date - Date, prior to maturity, on which a callable bond may be redeemed. If the item has a call date, enter it here.
Spread - Enter the spread as a percentage. The spread is used to determine whether the item will be called. See the following example of how the call switch works in the system:
Investments on the Asset side of the balance sheet:
Assumption Rate < (Coupon - Call Spread) = the investment will be called
Scenario Example:
|
Assumption Rate |
< |
(Coupon - Call Spread) |
= |
Action |
-100 |
4.00 |
< |
(5.50 - .5) = 5.00 |
Call It |
|
+-0 |
4.18 |
< |
(5.50 - .5) = 5.00 |
Call It |
|
+100 |
5.13 |
< |
(5.50 - .5) = 5.00 |
Don't Call It |
Investments on the Liability side of the balance sheet:
Assumption Rate > (Coupon + Call Spread) = the investment will be called
Scenario Example:
Assumption Rate |
> |
(Coupon + Call Spread) |
= |
Action |
|
-100 |
3.15 |
> |
(5.95 + .5) = 6.45 |
Don't Call It |
|
+-0 |
4.15 |
> |
(5.95 + .5) = 6.45 |
Don't Call It |
|
+100 |
5.15 |
> |
(5.95 + .5) = 6.45 |
Don't Call It |
|
+200 |
6.15 |
> |
(5.95 + .5) = 6.45 |
Don't Call It |
|
+300 |
7.15 |
> |
(5.95 + .5) = 6.45 |
Call It |
You will notice the calculation is reversed for investments on the liability side versus the asset side.
Optional Spread:
Spread is Rate - Apply Call above or below. Call FinSer if you require this type of setup. This feature has to be turned on by FinSer.
Pledgable - This checkbox should be enabled if the item is a security available to be pledged.
Percent Pledged - This field shows how much, if any, of this security is pledged for public funds.
Payment Information
First Payment Date - Enter the first paydate of the item.
Next Payment Date - Enter the next paydate of the item with regard to the current capture date.
Payment Ending Date - Enter the last paydate prior to maturity of the item.
Payment Amount - Enter the payment amount.
Payment Term - Select the appropriate combination to define a payment frequency.
Adjustable Rate Information
Rate Code - Enter the rate code of the item. This has to be a rate code already existing in the host system or manual rate.
Rate Reset Freq. - Choose from the options to select an appropriate Rate Reset Frequency.
Rate Variance - Enter the variance or spread in percent of the item to the original rate when the item was made.
Next Review - Enter the date the rate on the item is due for review. For Adjustable rate items this must be entered.
Rate Floor - Enter any applicable limit of the rate adjustment in the down direction over the life of the item.
Rate Ceiling - Enter any applicable limit of the rate adjustment in the up direction over the life of the item.
Period Cap - Enter any applicable limit for a single period rate adjustment.
Life Cap - Enter any applicable limit for a life time rate adjustment.
Lagging Index - Select Y if the rate adjustment on the item lags behind any adjustment on the underlying rate.
Add New Item
To add an item, click the Add New Item button. The same detailed security information screen, as for editing an existing item, will be displayed, but all fields are blank.
For help in entering data, follow the fields as listed in the Edit an Item section above. The sequence number field is a read-only field which will be assigned by the system when you are done entering a new item.
Delete an Item
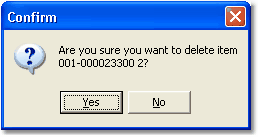
Matured items need to be deleted from the Misc. Data Entry file prior to processing. The system does not automatically delete the item when it matures.
Select the item to be deleted in the grid display, and select the Delete Item button. The system will display a confirmation message dialog box as shown below:
Import
The Import button will allow you to import a file containing your securities information from various file formats. The Misc. Data Entry Import options are set up in the Param. Setup module in a System Setup tab which is accessed by FinSer Support. The following import formats are currently available:
| 1. | Excel spreadsheet update |
| 2. | CDARS - A CSV file format |
| 3. | CDARS - Excel |
| 4. | Manual Cash Flow spreadsheet for customized cashflows |
| 5. | Files from portfolio providers (requires a defined interface) |
Setup can also be modified as to how Misc Data Entry will default the pledged flag for each new cusip entered or imported in Misc Data Entry. The default is typically set to N for not pledged.
Use of these files will help speed up the data entry maintenance of your items. If you wish to use this feature, please contact FinSer for assistance.
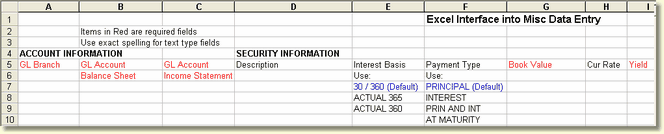
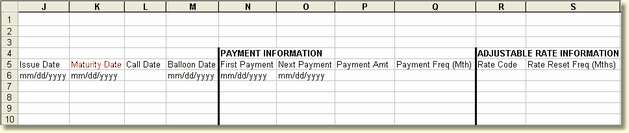
The Excel spreadsheet in number 1 above must be set up with predetermined columns (fields) as shown below.

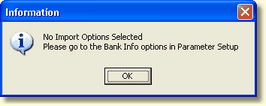
If the Import button is selected before FinSer Support has established the options, the following message will be displayed.
Misc Items Import
After selecting Import, the Misc Items import tab is displayed.
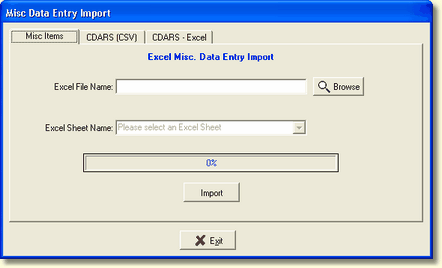
Manually enter the file name or use the Browse button to locate your file. For this Excel import, you must select the sheet the data resides on. Click the Import button. The status bar will show the progress of the file import.
CDARS (CSV) Import
When the CDARS (CSV) tab is selected, the following import screen is displayed.

Manually enter the file name or use the Browse button to locate your file. Select whether the CDARS import file is a liability or asset type file. Click the Import button. The status bar will show the progress of the file import.
CDARS - Excel
When the CDARS - Excel tab is selected, the following import screen is displayed.
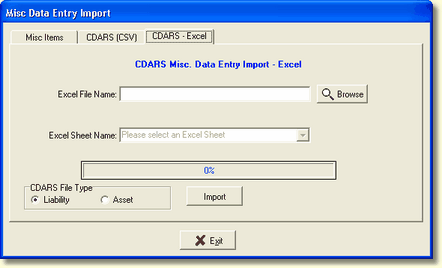
Manually enter the Excel file name or use the Browse button to locate your file. For this Excel import, you must select the sheet the data resides on. Select whether the CDARS import file is a liability or asset type file. Click the Import button. The status bar will show the progress of the file import.
When a new security or CDARS item has been added to the import file, a message will be displayed informing the user to set up the GL accounts for the new items.
The user will need to select the Assign Missing G/L function to enter the GL account numbers which will display the following screen:
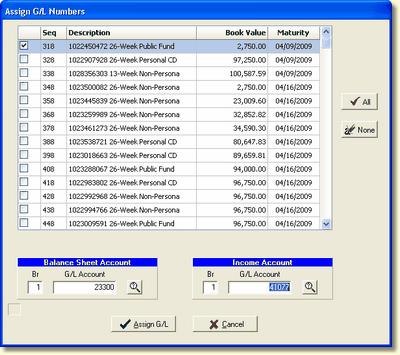
Select the items by checking the box to the left of the sequence number and assign the balance sheet and income or expense account numbers, at the bottom, to the new security or CDARS items.
Automatic Application Cross Reference Setup
If the G/L accounts assigned to the Misc. Data Entry item are new, the system will automatically set up the new G/L in the Application Cross Reference tab in Param. Setup.
Print Setup
You can generate a report of your Misc. Data Entry items by selecting the Print Misc. Data button. The system will display the report on your screen, using the preview window interface the system uses for all viewable reports. You can view or print from this screen.